Installing LED Tape – how to wire your small LED projects
At InStyle LED, we supply a range of LED strip lights – including a choice of sizes, different levels of brightness, and even waterproofing (IP67 rated). You can use our LED strips in almost any location or application, from bars, restaurants, and hotels to your home; from covings, plinths, and exterior locations to signage.
How to fit LED strip lights
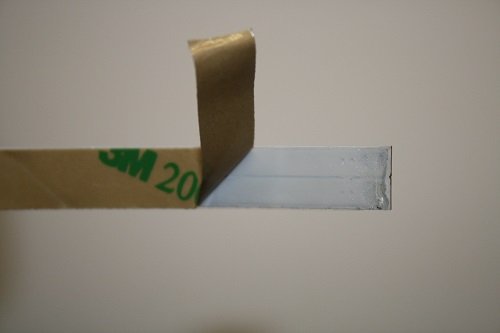
Using 3m self-adhesive backing:
Before sticking your LED strip lights into place, first decide exactly where you are going to position them. Clean the surface thoroughly and make sure it’s fully dry, then peel off the self-adhesive backing’s protective covering and press your LED strip onto the surface firmly. (Hint: Make sure you press against either the LEDs themselves or on an empty area of the LED tape – where there are no resistors.)
Using a hot glue gun:
If your LED strip is to be positioned resting on a flat surface, with the LED’s pointing upwards towards the ceiling, then the standard 3M self-adhesive backing will certainly be enough. But if the tape will be stuck vertically (on a wall, for example) or with the LEDs facing downwards, then the self-adhesive tape may not provide support for as long as you would like.
In these situations, we advise that you consider applying additional adhesive. Use small amounts of hot glue every 300mm, making sure that the glue doesn’t overflow onto the front of the LED tape (this would affect your LEDs). Hot glue can also be helpful next to the starter lead cable, or on any link cables going round corners because these can be hard to hold in place.
Using foam backing tape:
We advise upgrading to foam backing tape for applications where LED strips are to be stuck on its side or upside down. Foam backing is also very useful on uneven or other non-standard surfaces.
Foam backing tape is also available for our IP67-rated waterproof LED strip lights.
How to install your LED tape using fixing clips
Fixing clips are small clear rubber clips. Simple to fit, they can be screwed on either side of your LED tape to hold it in place. You can use as many fixing clips as you need to secure your LED strip lights.
You should consider using fixing clips on projects where LED strips will be positioned upside down or against a vertical surface. The clips are also a good option if you’re installing your LED strips externally, as self-adhesive backing is unlikely withstand rain and weather.
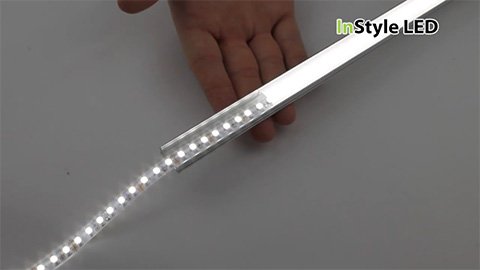
How to fit LED tape extrusions
If you’re using InStyle’s LED tape extrusions (sometimes called LED profiles), you can cut them to your required lengths very simply using a hack saw. If you need to cut extrusions at an angle, that’s no problem. (The frosted covers that slot into the extrusion, over your LED strip, can be cut just as easily).

LED tape extrusions can be fitted into place by using counter sink screws, or with fixing brackets. These brackets are screwed into place, and you then clip your LED extrusion to them. A third option is to use our foam backing to secure your extrusion in position – by sticking the backing all along the underside of the extrusion and pressing it directly onto the surface where the extrusion is to be mounted.
How to cut and solder LED tape
Cutting the LED Tape:
Different products in our LED strip light range have cut-points at different intervals. They can be 25mm, 50mm, 100mm or 166mm apart, depending on the type of LED tape you’re using. (For a full list of cut-point spacings, see our support page on cutting your LED strip lights to length).
Soldering the LED Tape:
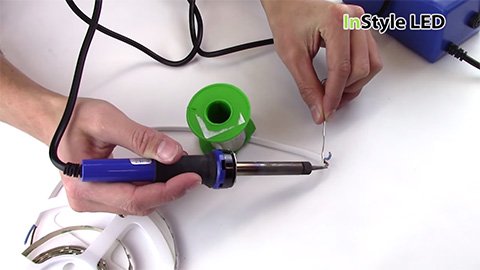
The solder pads at each cut-point are also used to connect lengths of LED tape together. On single-colour LED strips, each pad is labelled positive (‘+’) or negative (-‘); on RGB, pads are labelled positive (‘+’), red (‘R’), green (‘G’) or blue (‘B’).
To solder two pieces of LED tape together, begin by trimming the tape ends to be connected – cutting all the solder pads in half (to make semicircles). Once that’s done, you can butt the two tape-ends so the half-pads form full circles again then solder them together.
Extending cable:
If you need to extend an existing starter-lead cable, you can do this simply by using a standard connector block (available from any electrical wholesaler.) Strip your cable and screw it into either side of the connector block.
What thickness cable should I use with my LED strips?
Up to lengths of 5 metres, Instyle recommend using 0.5mm cable.
For lengths up to 10m we advise 1mm cable.
We recommend 1.5mm cable up to 15m, and 2mm cable up to 20m.
These guidelines will assure you have cable of the correct thickness cable to carry current and avoid voltage-drop.
How to install LED strip lights to go round corners
To go round corners, simply cut you LED tape then solder a length of link cable to connect the ends. Link cable is standard 2-core or 4-core cable. As long as you have cable of the appropriate thickness (see above), it can be as long as you require.
What are connector clips for LED strips?
Tape-to-Tape connector:
Tape-to-tape connectors avoid the need to solder LED strips together. Using them, you can join two lengths of LED tape – so they function as if they’re a single strip. Tape-to-tape connectors are available in a variety of types and sizes, to fit both single-colour and RGB LED tapes.
Starter-lead connector:
A starter-lead connector is used to fit a starter cable to an LED strip without the need for soldering. Starter-lead connectors come in various types, for single-colour and RGB LED strip lights.
To fit your starter-lead connector, simply open it up, then slide the LED strip into place and close it again.
How do I waterproof my LED tape again after it’s been cut?
Cutting and soldering your waterproof LED strip lights will mean they’re no longer IP67-rated. But you can easily bring them back up to their original waterproofing standard by following these steps. (You’ll need a hot glue gun, and some clear heatshrink.)
- Begin by applying some hot glue to the end of your LED tape that needs re-waterproofing.
- Then slide the heat shrink over the glue.
- Finally, heat up the heatshrink with a heat gun so it goes tight over the glue.
- This will reseal your LED strip lights back to their original IP67 rating.


